A couple of things to remember about Netflix cancellation:
- How you cancel your Netflix subscription depends on how you set up the service. If you subscribed to Netflix directly, you will need to cancel via the Netflix site. You will need to use an iPhone or an iPad if you started the subscription using iTunes.
- Deleting your Netflix profile has nothing to do with your subscription and billing. Removing your Netflix profile is simply not enough and you will continue to be billed. So, make sure to cancel the subscription in order not to get unexpected write-offs.
- If you actually cancel your Netflix subscription, the service will keep the information about your preferences for 10 months in case you would like to come back.
Here’s how you cancel your Netflix subscription on various platforms.
How to cancel Netflix using a web browser
Step 1: Visit Netflix
Start your web browser and go to Netflix.com. Use this cancellation method if you signed up for Netflix services using their website and you are being charged by Netflix directly. You can use this way to cancel your subscription on a computer, phone, and tablet.
Step 2: Sign in
If you are not signed in to your Netflix account, click the “Sign In” button in the upper right corner. Enter your email address or a phone number, type in your password, and click the “Sign In” button once again. You can also sign in to Netflix using your Facebook account.

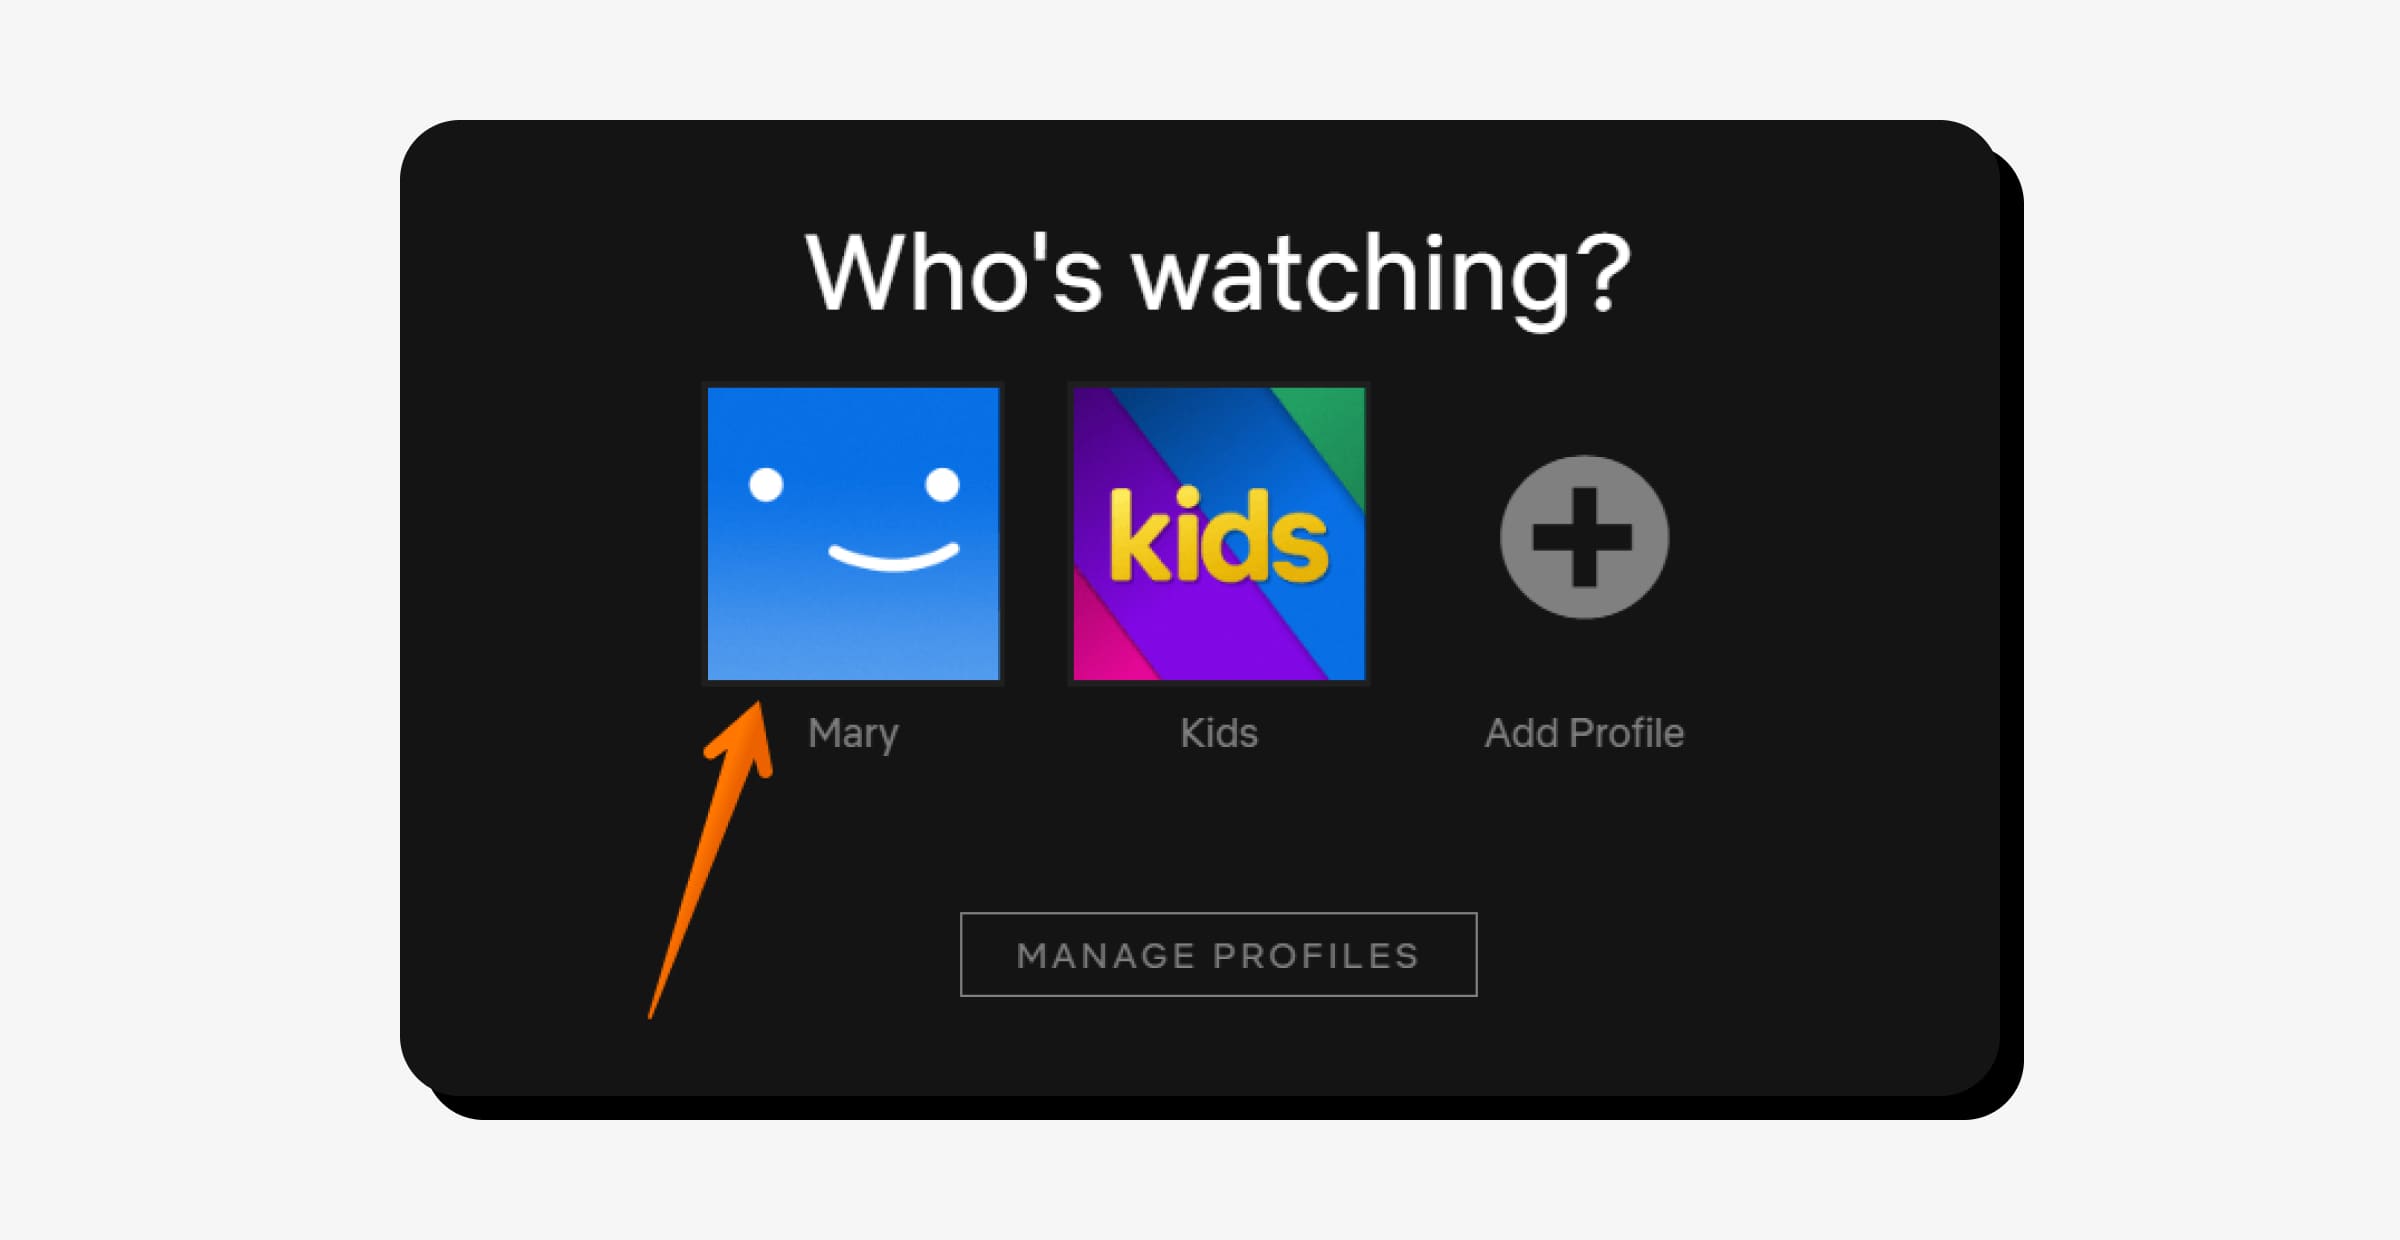
Step 3: Click the main profile of your Netflix account
Click the main profile of your account, it is the first icon with a name.
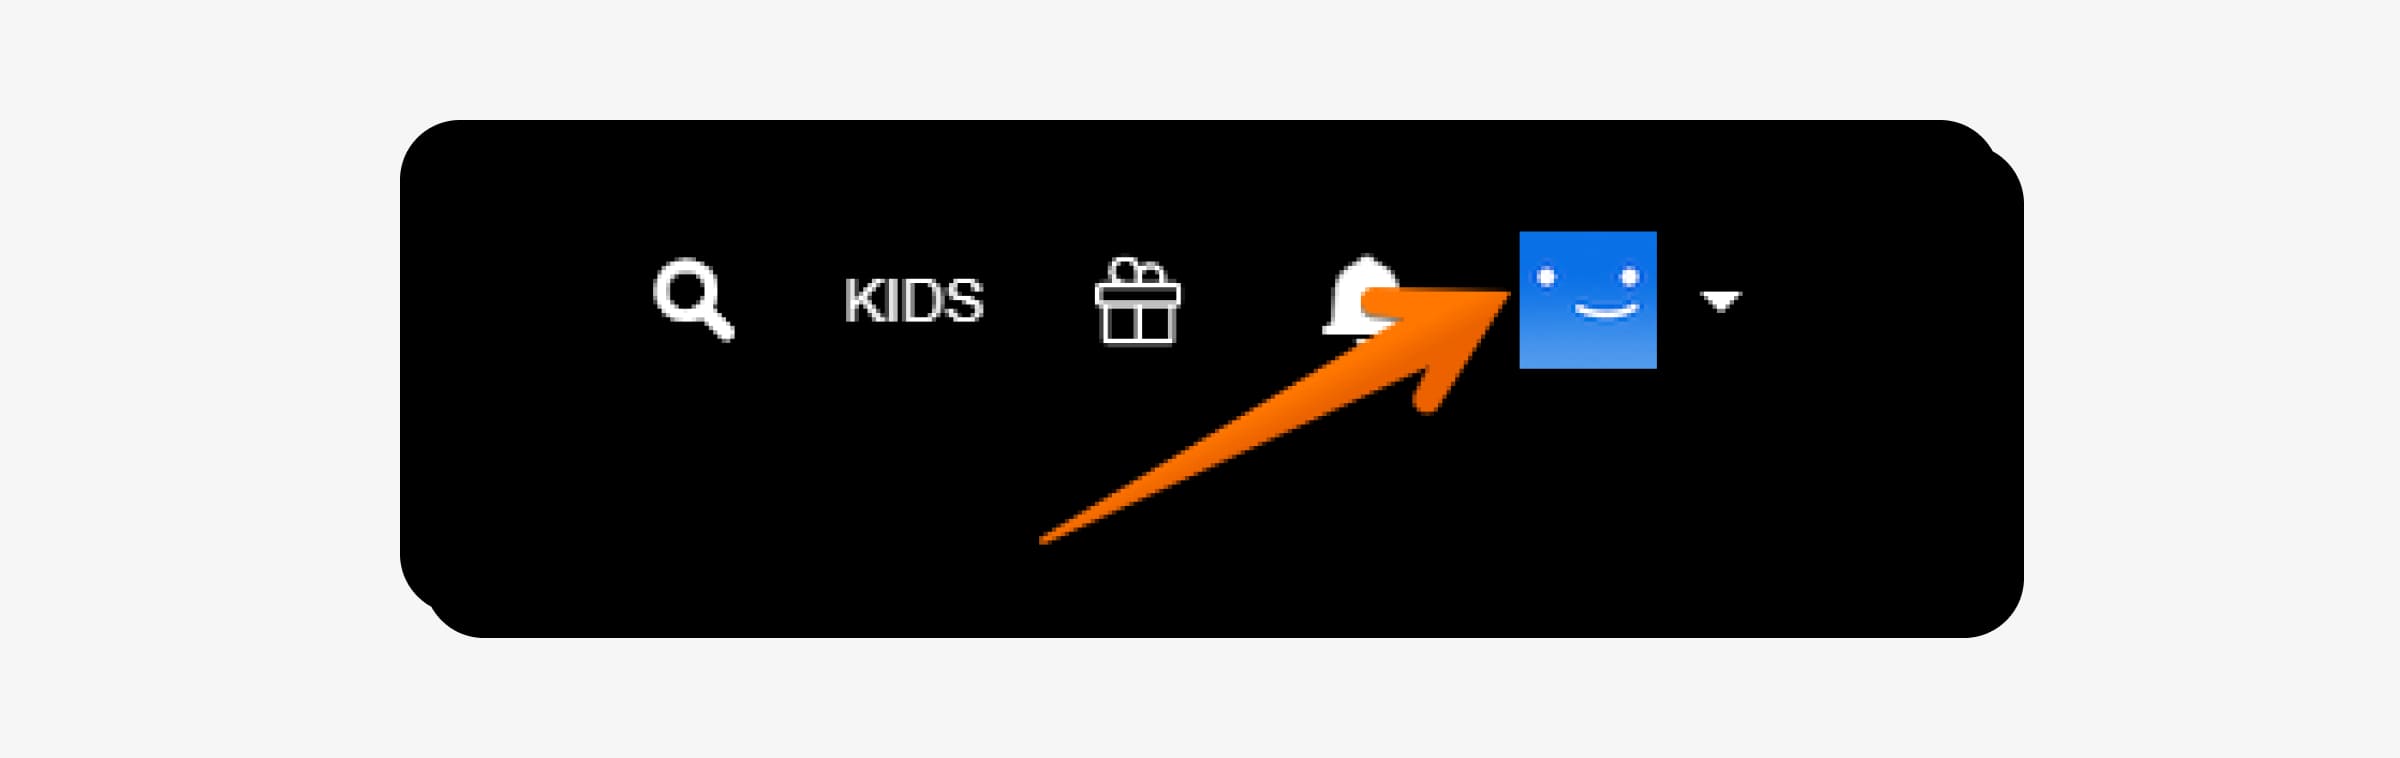
Step 4: Click your profile photo
Click your profile photo next to the down-pointing arrow at the top right corner of the page. A navigation menu will appear.
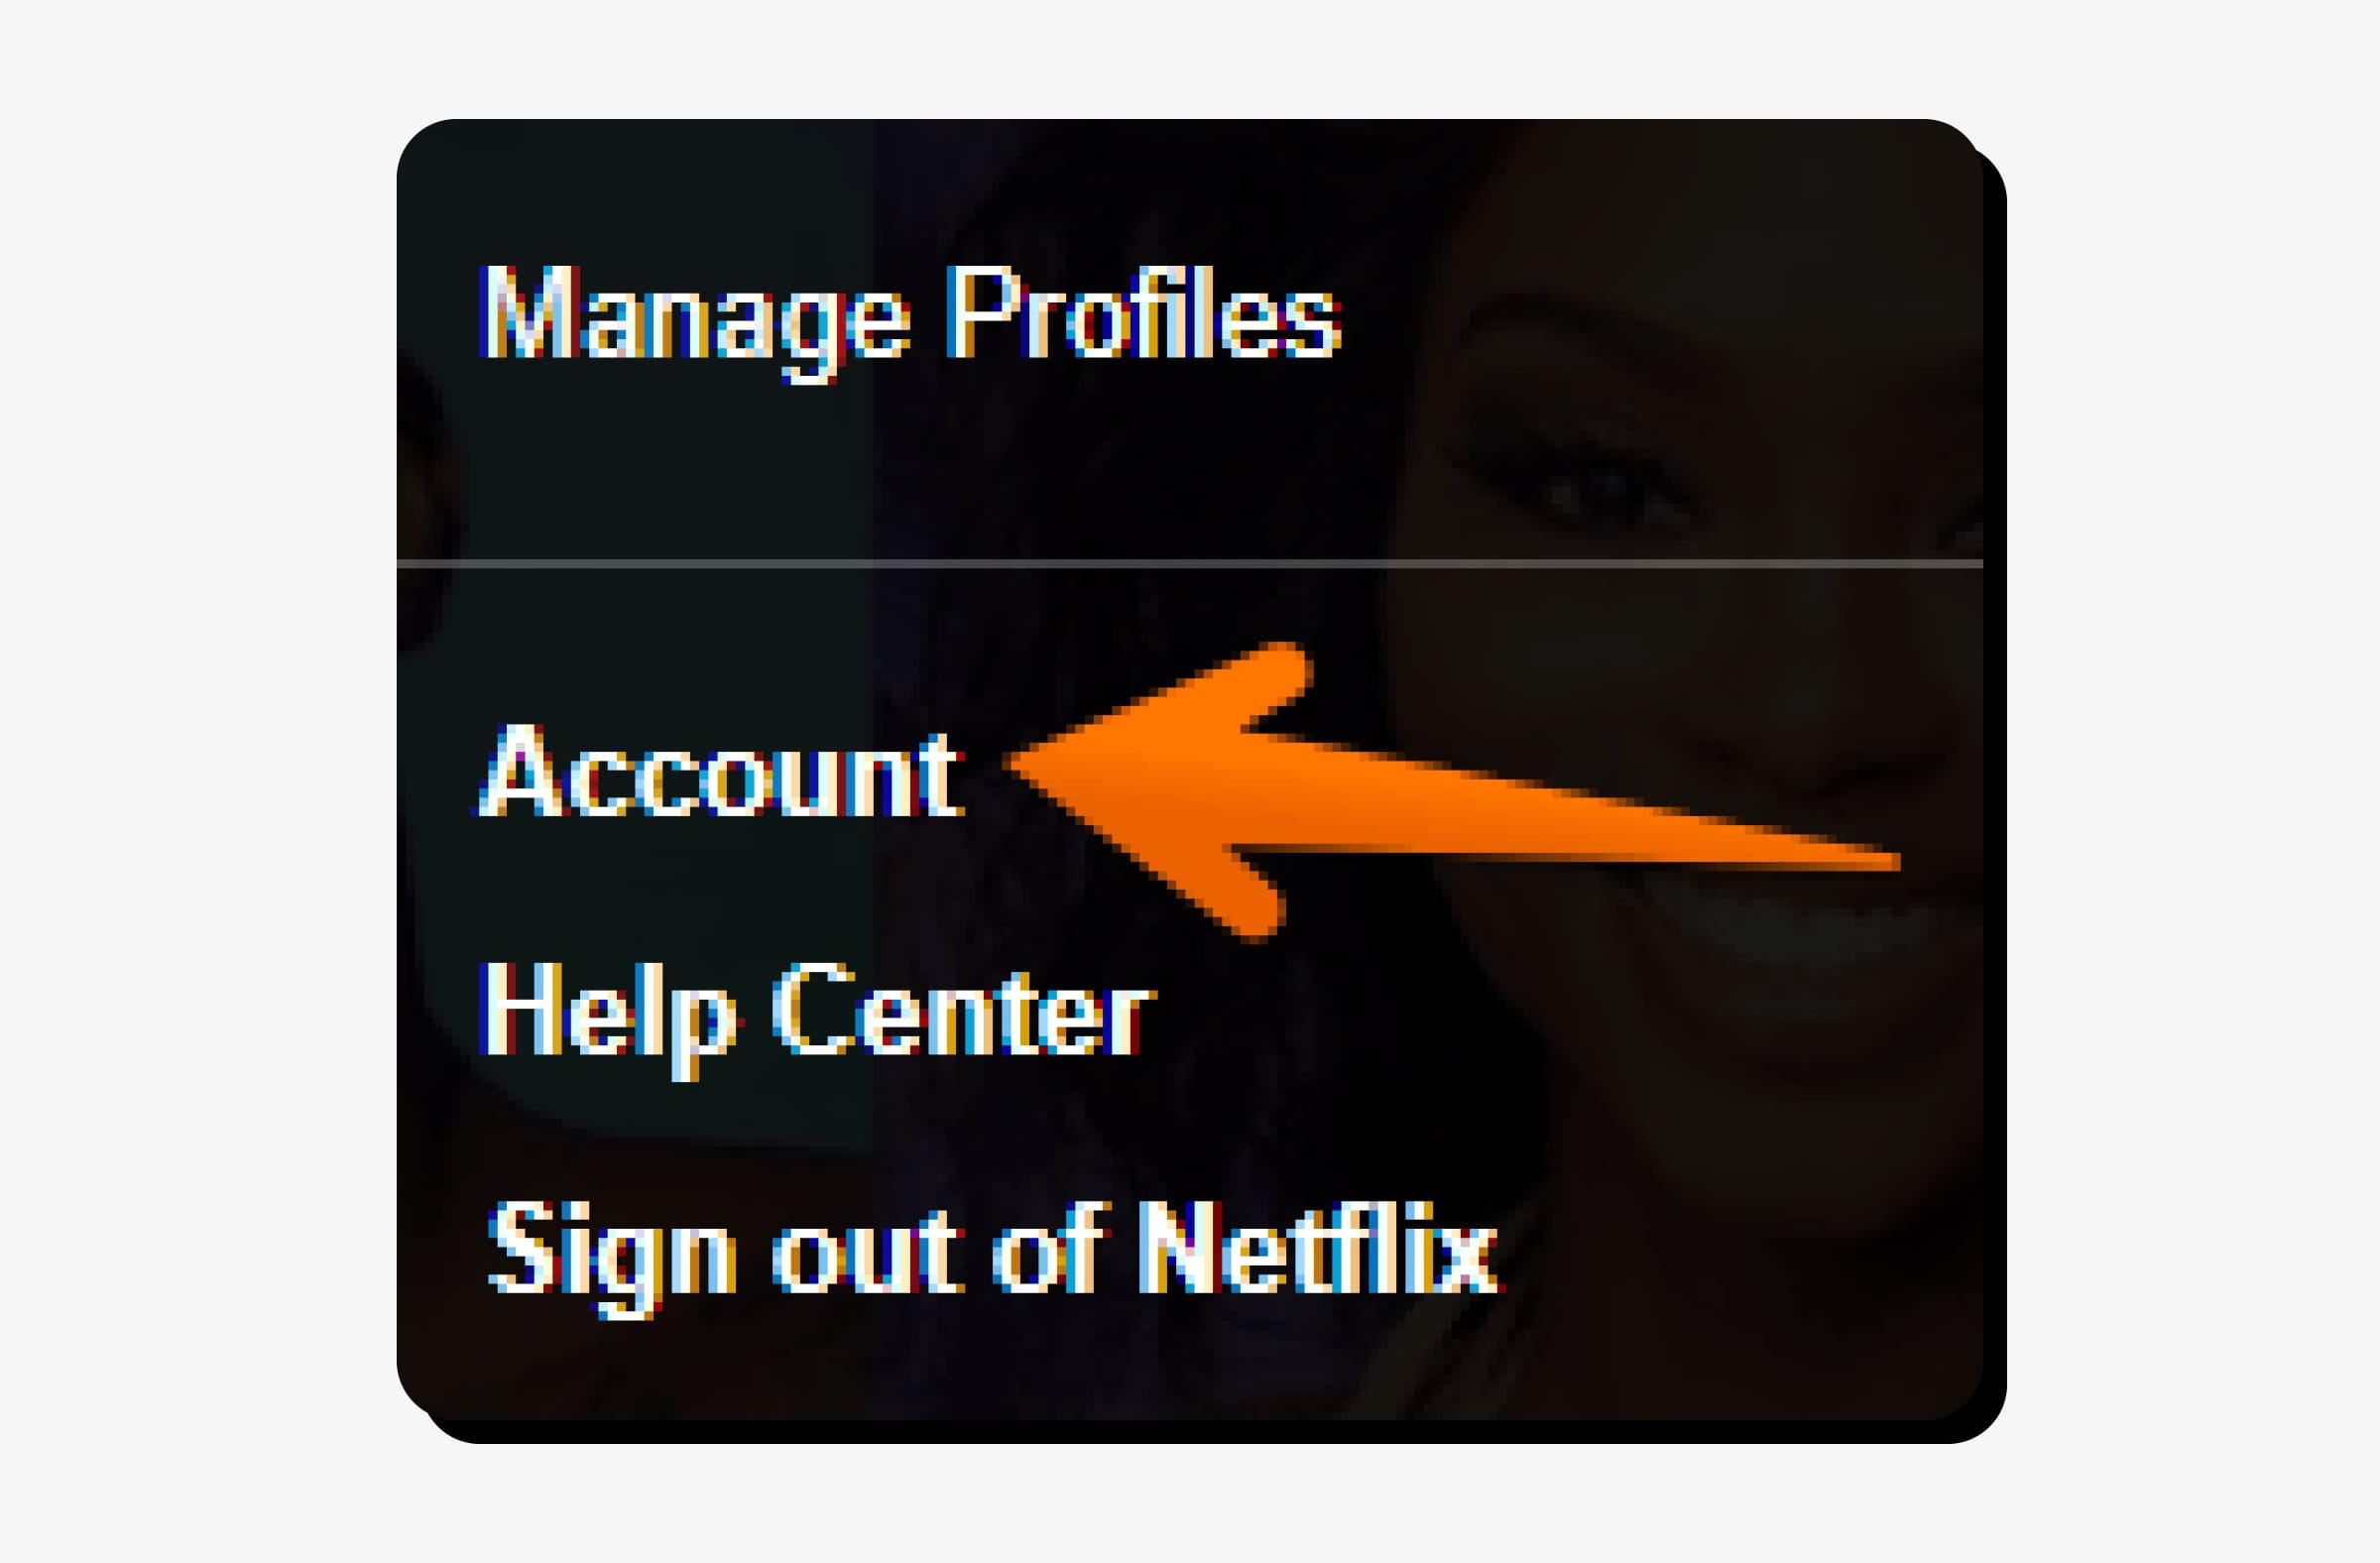
Step 5: Select “Account”
Click “Account” on the navigation menu.
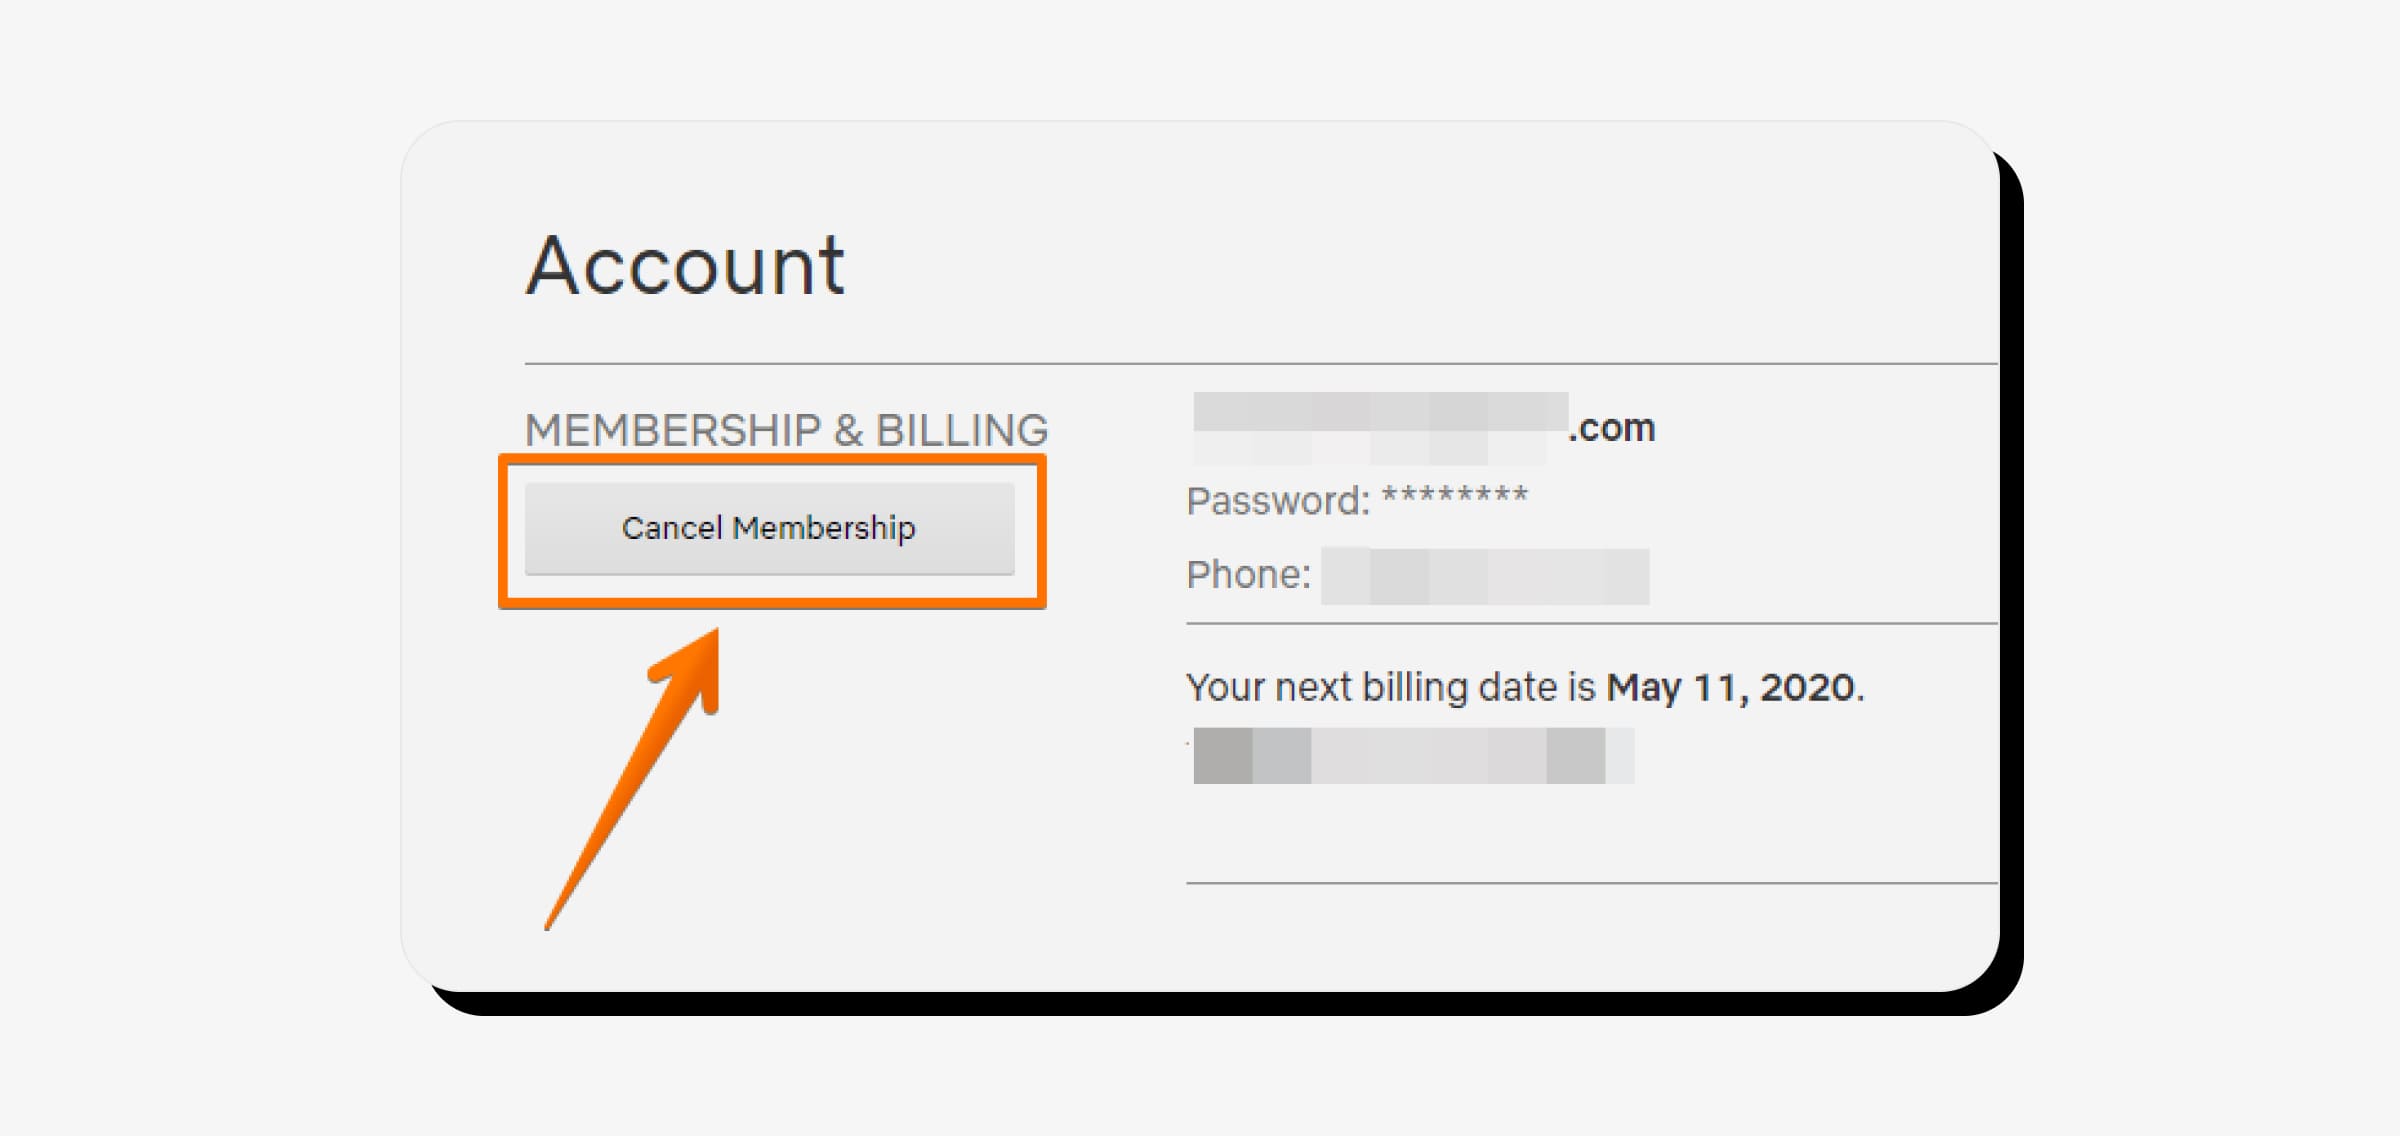
Step 6: Click the “Cancel Membership” button
Find the “Cancel Membership” button, it is in the upper left part of the page, below the “MEMBERSHIP & BILLING” section. Click it to confirm the cancellation of your Netflix membership.
Please note that if you do not see the option to cancel your Netflix subscription, it is because you are not being billed directly by Netflix. This page will display a third-party service you’ve used to subscribe to Netflix. It can be Google Play, Amazon Prime or iTunes, etc.
Step 7: Click the “Finish Cancellation” button
Click the “Finish Cancellation” button to complete the removal process. The Netflix service will keep on working until the day of your next billing cycle.
How to cancel Netflix on Google Play
If you’re being billed for your Netflix service by Google Play, you will need to use this method to cancel the subscription. Here is how to do this.
Step 1: Go to the Google Play Store
Go to play.google.com/store/account/subscriptions.
Step 2: Log in to your Google account
Log in to your Google account, if not already.
Step 3: Tap the menu
Tap the menu at the top left.

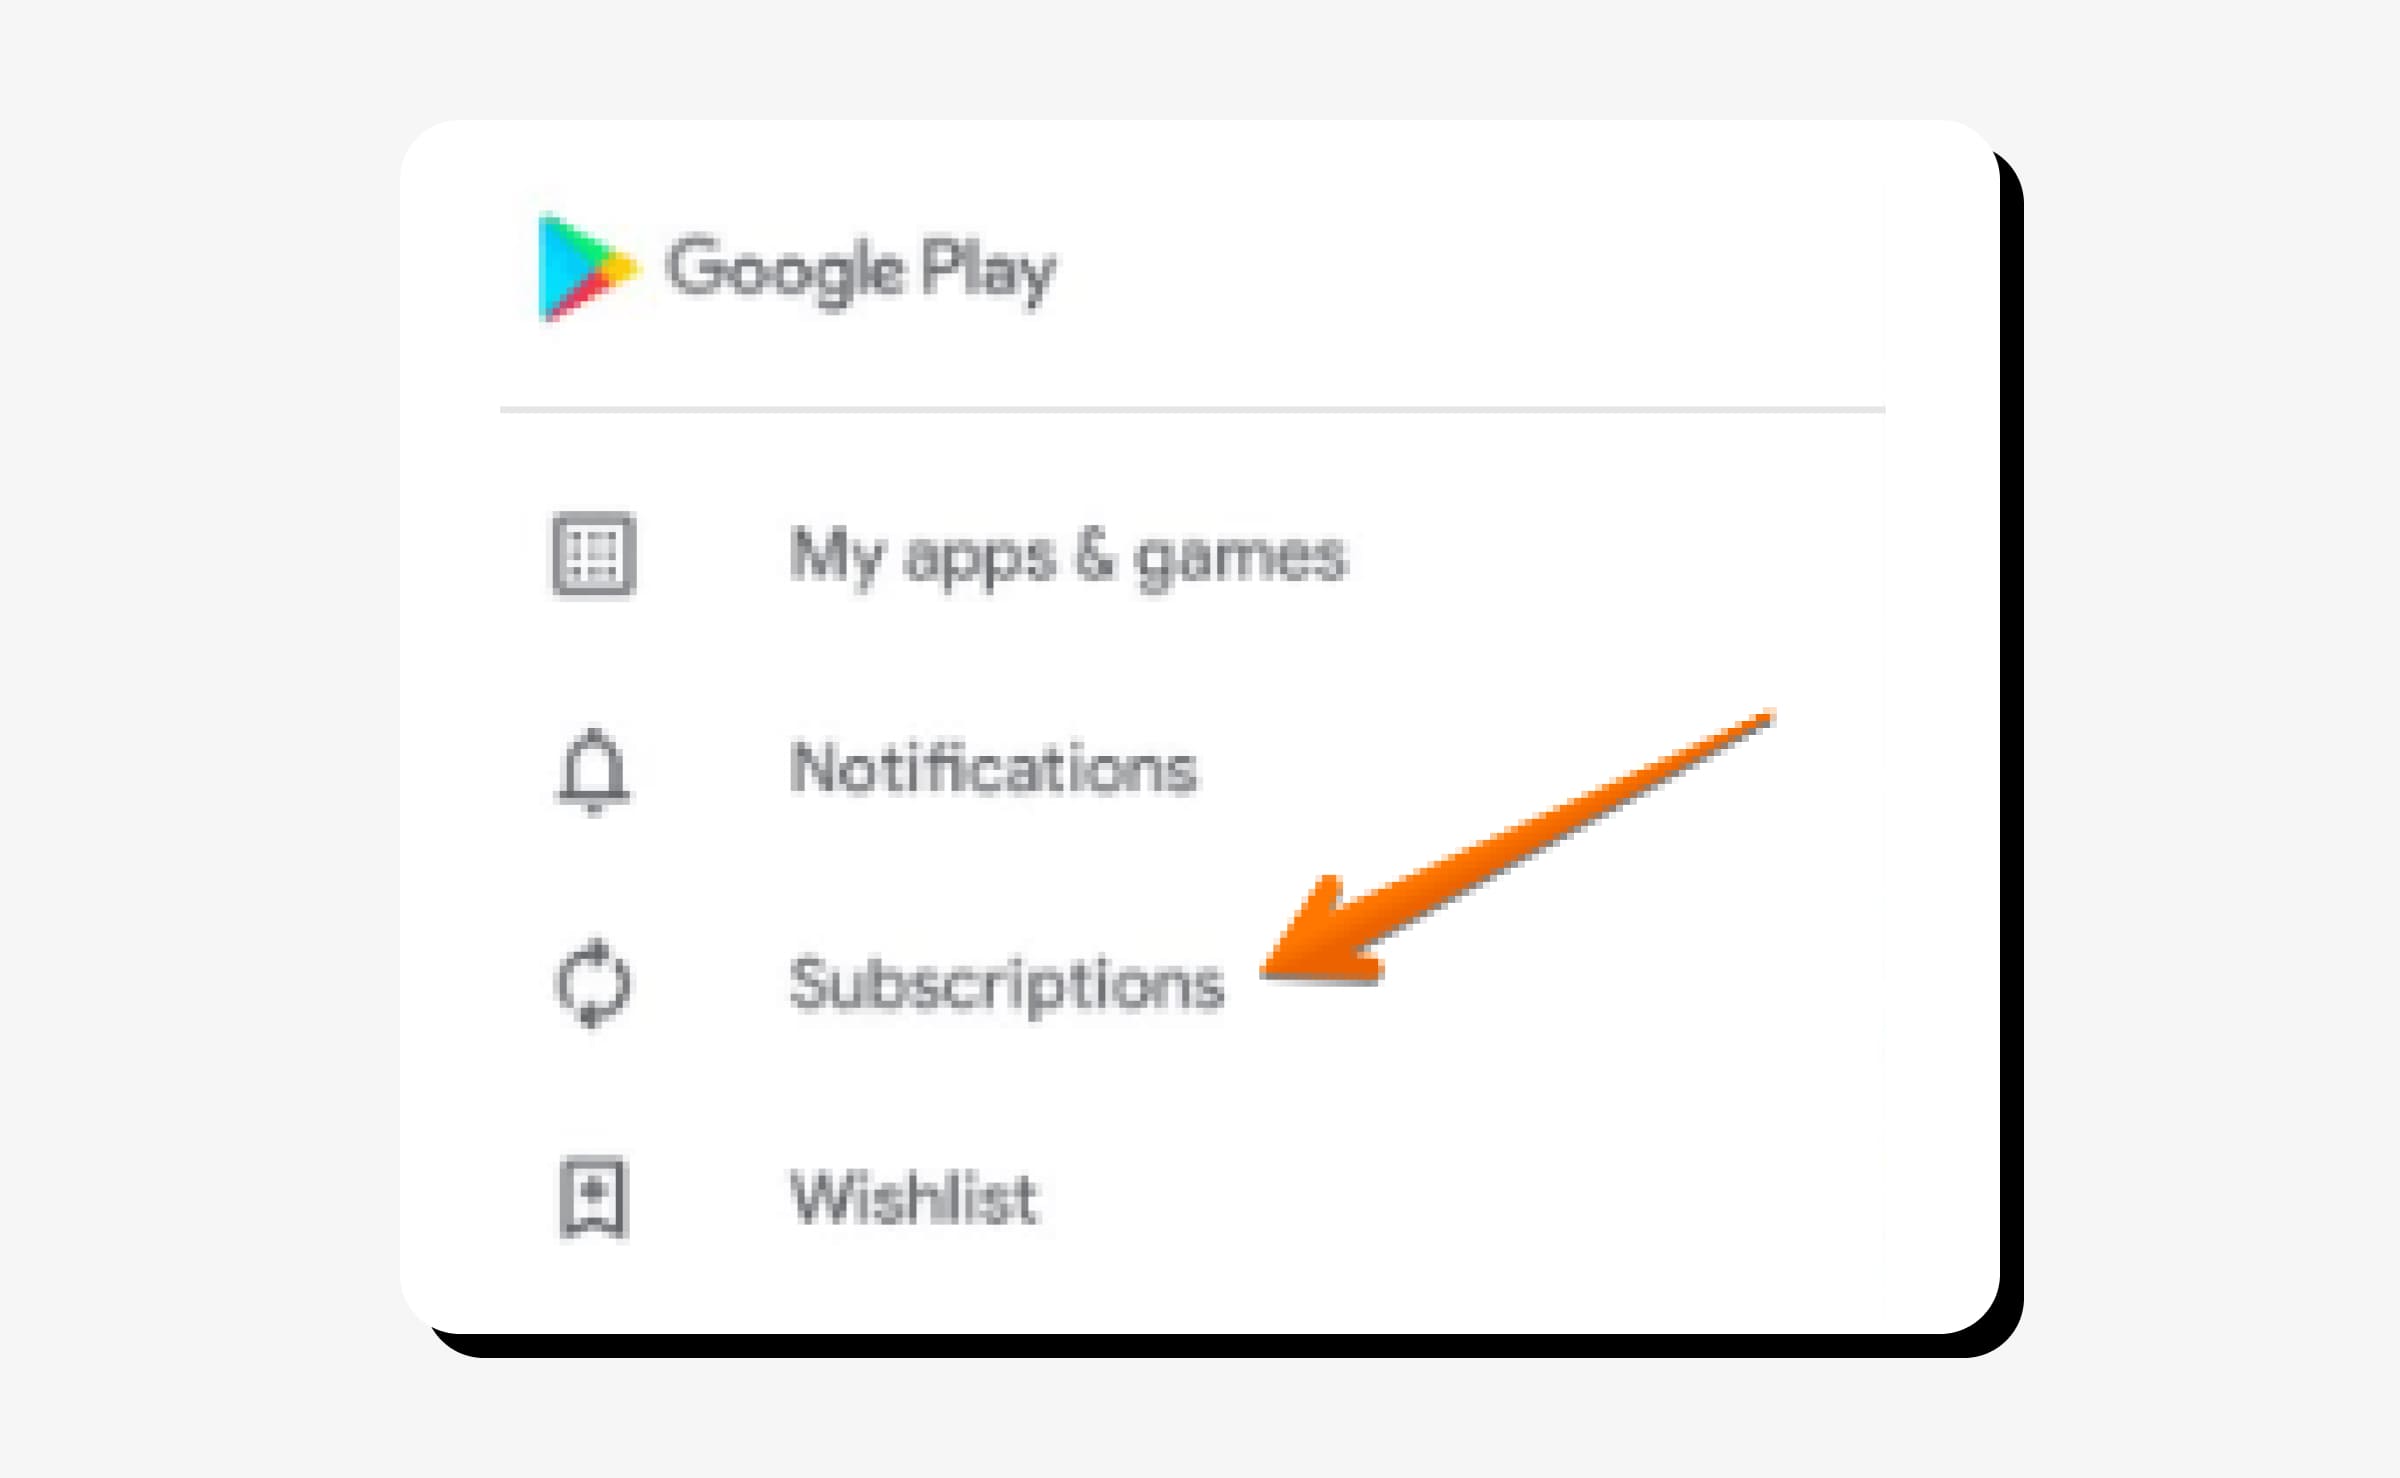
Step 4: Tap Subscriptions
Tap the “Subscriptions” section on the menu. You will see a list of your Google Play subscriptions.
Step 5: Find Netflix subscription and tap it
Find Netflix in the list of your Google Play subscriptions and tap it. You will see the information about your account such as service rate and renewal date. Please note that if you do not see Netflix in the list of your subscriptions, probably you used a different Google account to sign up.
Step 6: Click Cancel Subscription
Click “Cancel Subscription” to submit the whole process. Netflix will keep on working until the final day of the next billing date. You won’t be charged again.
How to cancel Netflix on iTunes on iOS
If you’re being billed for your Netflix subscription via iTunes, you need to use this guide to cancel it using your iPhone or iPad.
Step 1: Open Settings on your iPhone or iPad
Start the Settings app on your iPhone or iPad.
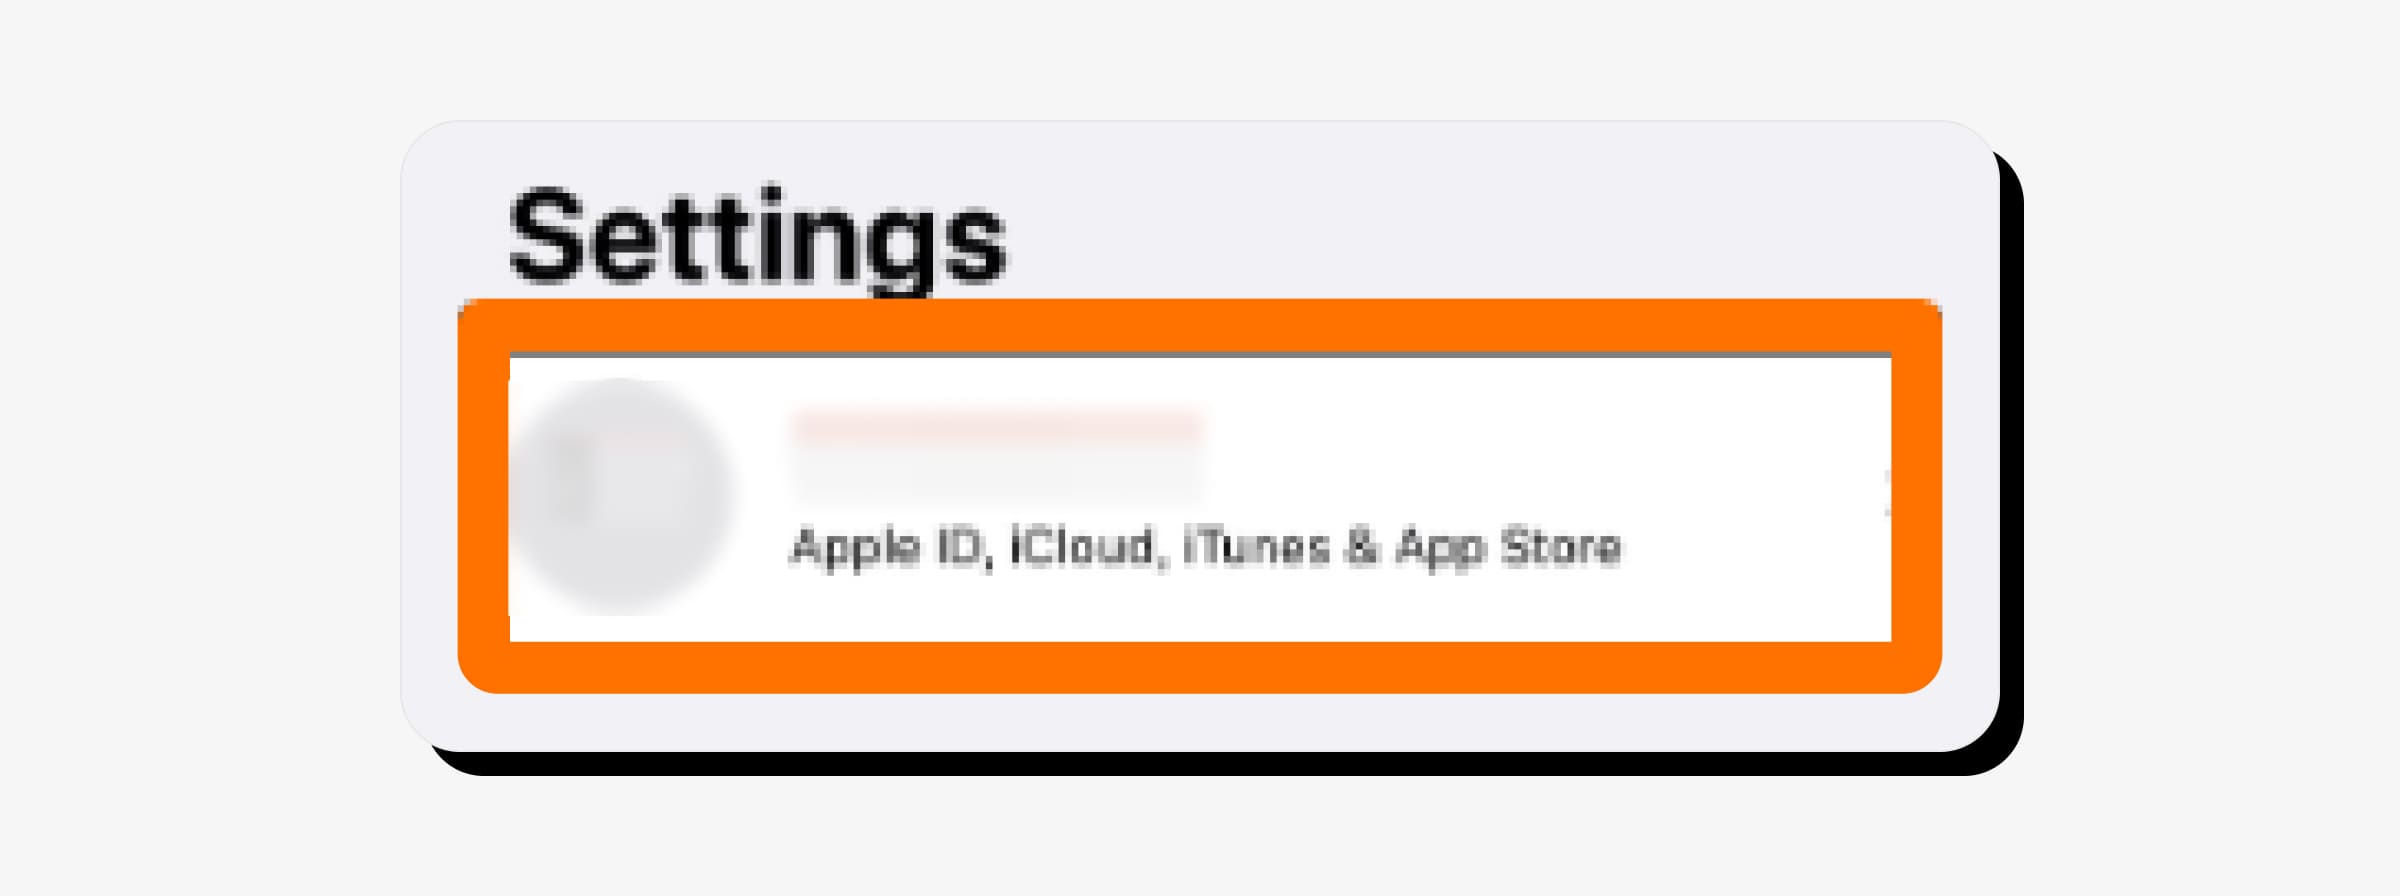
Step 2: Tap your name
Tap your name at the top of the screen.
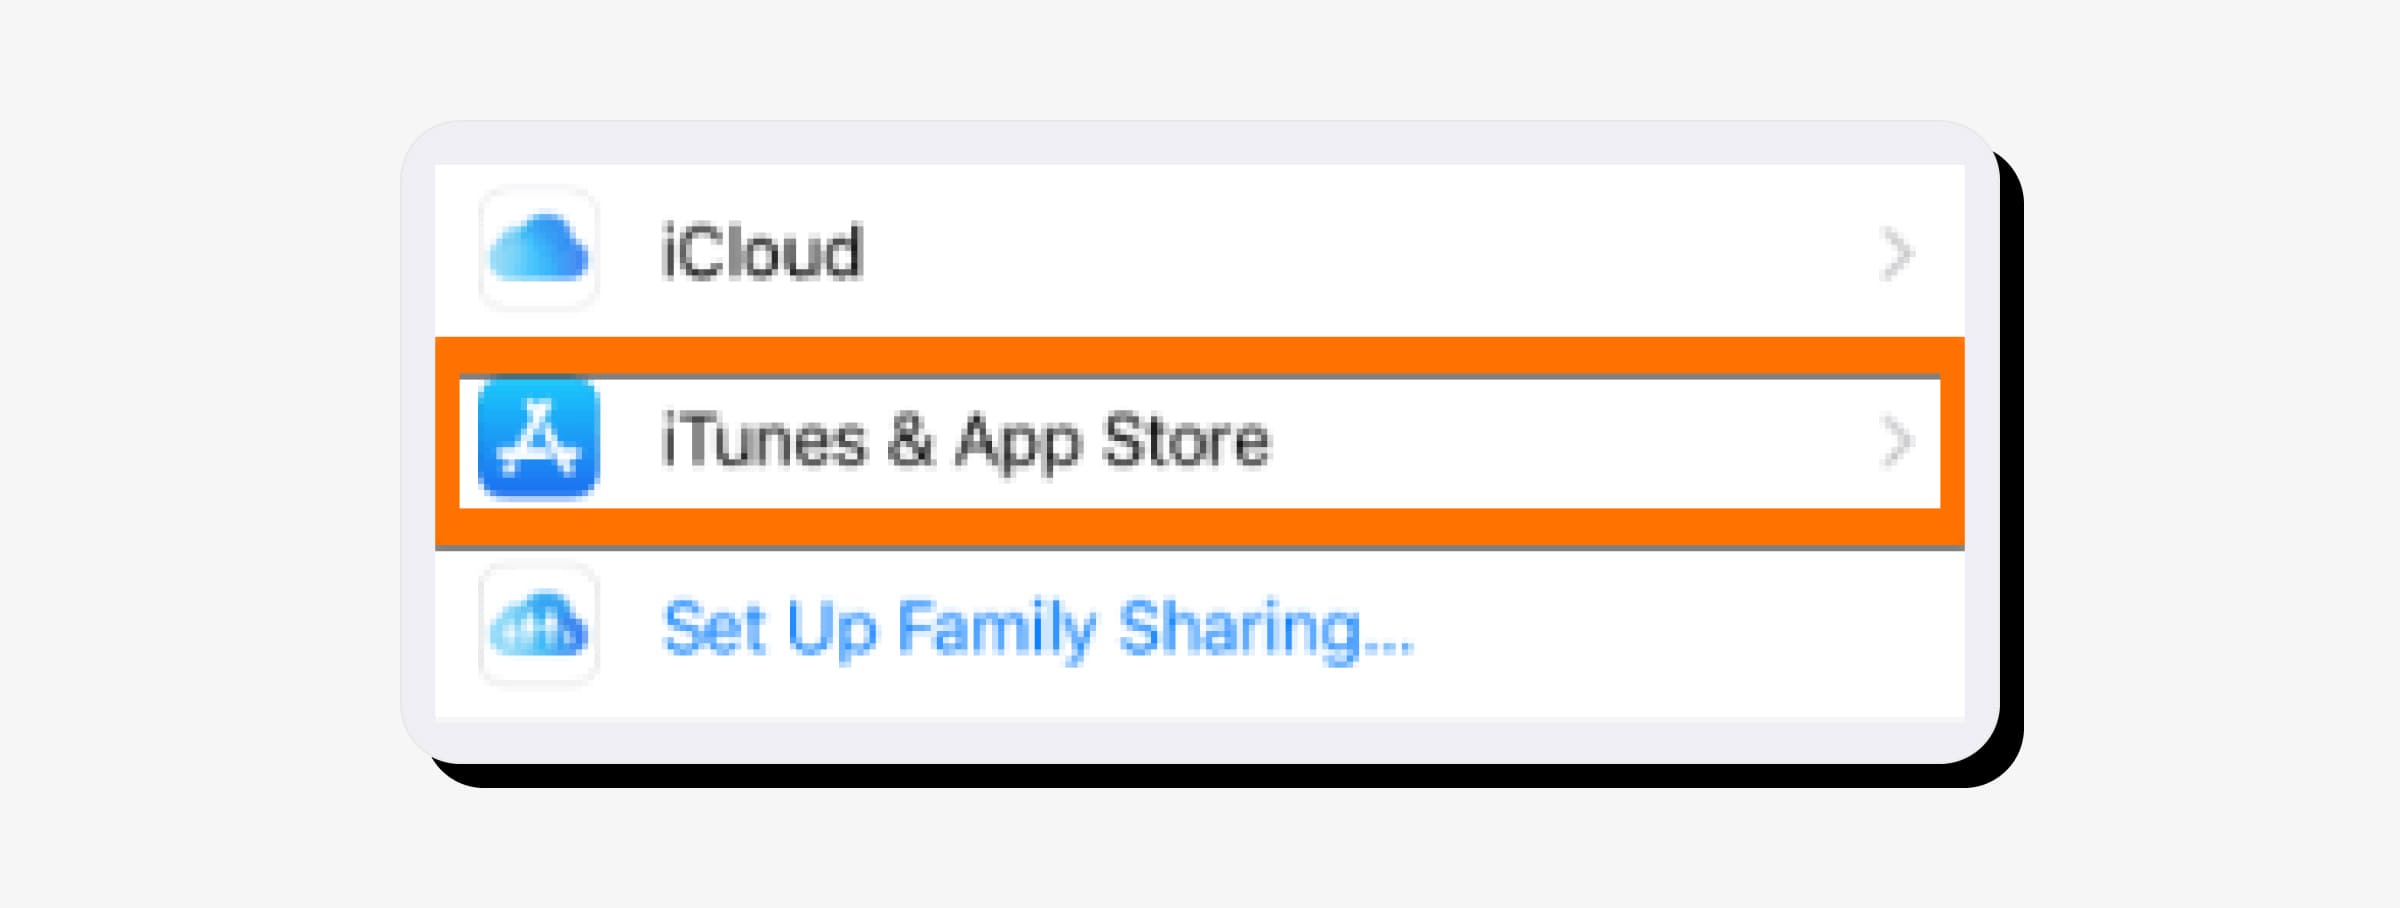
Step 3: Tap “iTunes & App Store”
Tap “iTunes & App Store” to find Netflix.
Step 4: Tap your Apple ID
Tap your Apple ID at the top of the screen of your device. A menu will appear.
Step 5: Tap “View Apple ID”
In the appearing window, tap “View Apple ID”. You may also have to verify your identity to proceed.
Step 6: Tap “Subscriptions”
Scroll down and tap “Subscriptions”.
Step 7: Tap your Netflix subscription
You will see Netflix in the list of your subscriptions. Tap it. If you don’t it is possible that you signed up for Netflix using another Apple ID or service.
Step 8: Cancel your Netflix subscription
Tap “Cancel Subscription” at the bottom of the page. You will see a confirmation message on your screen.
Step 9: Tap “Confirm”
Tap “Confirm”. You have canceled your Netflix subscription.
How to cancel Netflix on iTunes on a Mac OS
Use this guide to cancel your Netflix subscription through iTunes on your Mac computer.
Step 1: Open iTunes
Open iTunes on your Mac computer.
Step 2: Select “My Account” menu
Select the Account menu at the top of the screen on a Mac computer. Then choose “View My Account” on the menu.
Step 3: Manage your account
Scroll down the Settings section and select “Manage”.
Step 4: Manage your account
Scroll down the Settings section and select “Manage”. The list of your subscriptions associated with this Apple ID will appear.
Step 5: Click “Edit”
Click “Edit” next to Netflix. The information about your subscription will appear. If you do not see Netflix in your subscriptions, it is possible that you’ve signed up for Netflix using another service or Apple ID.
Step 6: Click “Cancel Subscription”
Click “Cancel Subscription” at the bottom of the page. You will see a confirmation message on your screen.
Step 7: Confirm Netflix cancellation
Click“Confirm” to confirm your choice. You have canceled your Netflix subscription.
How to cancel Netflix on Apple TV
Use this guide to cancel your Netflix subscription through Apple TV.
Step 1: Go to Settings and select “Accounts”
Find and select Settings on the Apple TV. Select “Accounts”.
Step 2: Click “Manage Subscriptions”
Under the “Subscriptions” section find and click “Manage Subscriptions”.
Step 3: Tap your Netflix subscription
Tap your Netflix subscription. If you do not see Netflix in your subscriptions, it is possible that you’ve signed up for Netflix using another service or Apple ID.
Step 4: Select “Cancel Subscription”
Select “Cancel Subscription”. You will see a confirmation message on your screen.
Step 5: Follow the on-screen instructions to confirm cancellation
Follow the on-screen instructions to confirm cancellation. Netflix will keep on working until the final day of the next billing date. You won’t be billed again.
How to cancel Netflix through T-Mobile
If you access your Netflix account using T-Mobile, you will need to perform the cancellation process through it. Use this guide to cancel your Netflix subscription through T-Mobile.
Step 1: Log in
Log in to your T-Mobile account.
Step 2: Select “Manage Add-ons”
Once logged in to your account, select “Manage Add-ons”. It is placed under the “I Want To” section.
Step 3: Unselect the subscription
Scroll down to “Services”. Unselect the checkmark by the one Netflix subscription you’re signed up for.
Step 4: Continue the removal
You will see a pop-up message informing you that you will no longer have access to your Netflix subscription. Click “Continue Removal”.
Step 5: Click “Continue”
Scroll down the page and click “Continue” in order to remove your Netflix subscription and you’re done! Please note that you will be able to access the service until the end of your billing cycle period.
How to cancel Netflix through Amazon
Use this guide if you signed up for Netflix as a channel to your Amazon account.
Step 1: Go to Amazon
Go to Amazon. Sign in to your account if prompted.
Step 2: Accounts & Lists
Find “Accounts & Lists” near the right corner of the page and click it.
Step 3: Select “Memberships & Subscriptions”
Select “Memberships & Subscriptions” under the “Your Account” section.
Step 4: Select “Channel Subscriptions”
Select “Channel Subscriptions” near the bottom left corner.
Step 5: Cancel Channel
Select “Cancel Channel”. You will see a confirmation message. If you do not see Netflix in the list of your subscriptions it might be that you’ve signed up for Netflix using a different Amazon account or service.
Step 6: Confirm cancellation
Click “Cancel Channel” to confirm and you’re done! You will be able to access your Netflix account until the end of a billing cycle period.
View Privacy Policy and Terms of Use.


With over 8 years of experience in the field, the Onerep editorial team has deep expertise in data brokers, privacy violations, and fraud prevention. Through extensive research and conversations with customers, we’ve gained key insights into prevalent scams, data protection challenges, and common concerns around data exposure.